 I ended up getting in on a cancelled time this morning and having my two lower wisdom teeth removed. Since I am couch-stuck for a couple of days, I have time to sit and blog now! I thought I would be feeling quite a lot worse and had prepared to just watch movies, but I'm feeling way better than what I thought so here I am.
I feel like a hamster right now with some very chubby cheeks... Yeah, I'm not puffing them up or anything in that picture.
I wanted to share exciting printing results from a recent polymerplate and linocut class I taught, and share some of the info from the nontoxic intaglio class. Might have to break it up into two posts...
So I have been working with a couple of students here and there. It is always exciting when we come up with new ideas and when prints turn out beautifully. The smiles of students feeling accomplished always keep me motivated to teach class. While doing some printing of linocuts with a friend on Friday, we came up with a "new" way of registering. it was new to me, even though it might not be new to you.

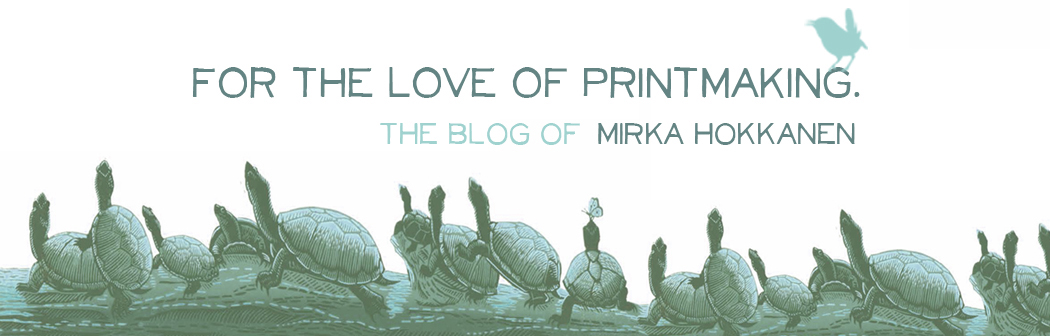
She had a two plate unmounted linoleum block that we wanted to print on my little etching press. So instead of having an L-shaped registration plate- or printing like an etching- we took a piece of mylar, drew the plate mark and paper edges on it. We taped some mat board on the edges for a paper guide. I guess the end result is a hybrid between Asian woodcut registration and etching registration. This seemed to work well for her, so I would be willing to try this again in the future when printing though an etching press.
above- linocut set on the registration sheet.
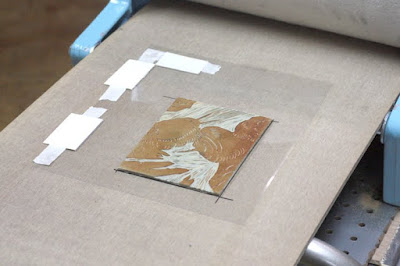
below- setting the paper over the top.
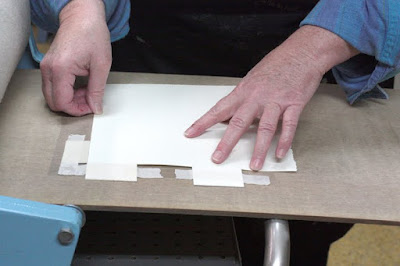

above- after running through the press, we left one edge caught under the roller, and brought the next plate (ready inked up) over to the press.
below- changing the plates out.
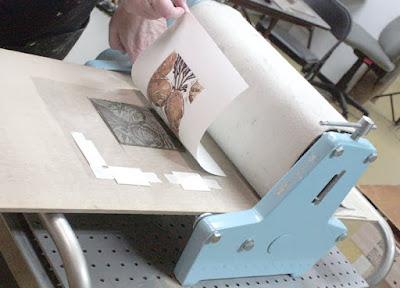
above- pulling the first proof is always very exciting!
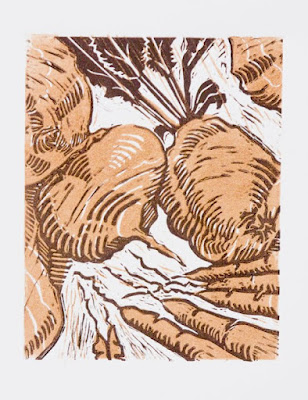
below- finished print by Gail Kelly.

Going back in time to the class I took in Finland. We were taught 4 different types of nontoxic
grounds to use with ferric chloride. The first one we did was Johnson- floorwax hardground. Reading online, I don't know if they have that available in the US. Does anyone know about that? The hardground formula had 1 part floorwax and 1 part Golden Stop out. We would spread it on a copper plate that had been cleaned from all grease, and let it drip a while, and then we would heat it over a hotplate to set the ground completely. The heat helps the ground bond to the plate better.

Above- nook with tub of salt-vinegar solution and sink.
We were using two kinds of Johnson floor polishes that have different properties. The "shinewax" (direct translation from Finnish) flakes off slightly when you draw with a needle, so fine linework/hatching is out of the question but it will take longer etching times. The "endurance wax" we used straight out of the bottle, with out the stop out. It is more flexible and does not chip out when drawing through, but it will not take as long etching times. Because you are using it straight out of a bottle it was clear and hard to see what you were drawing, but if you mix a little bit of india ink in it, you should be ok. You can also coat it twice to make the etching time longer. I liked the second one better, because it was easier to draw though and I normally don't do long etching times anyways.

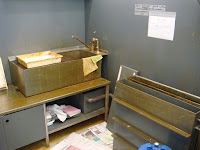
Above- nook to clean grounds off plates, we reuse the solution over and over again. At the end of they day, the solution was stored in the gallon jugs.
Below- 2 etching tanks, large vertical and small horizontal. We were using edinburgh etch so you could etch horizontal as well.
Note: make sure you are cleaning the plate thoroughly before coating it with the ground. We dipped our plates in a solution of:
1 part vinegar
1 part salt
3 parts water
After dipping through solution, rinse plate quickly and blot dry.
You can remove the grounds with a solution of 1.5dl washing soda crystals diluted in 1 liter of water.
We also used the floorwax for aquatint. 1 part johnson wax and 1 part Golden Stop out. Make sure as in the technique above your plate is completely clean before you coat it. To block out areas in between etchings, we were using the wax+stop out and the Golden Stop out. Make sure its dried out before you put it back in the bath.
I found at least two other websites that were talking about these materials: nontoxic printmaking by Friedhard Kiekeben and a slide presentation who I could not find an author for- they also cover the soft ground methods I'll talk about tomorrow.
I have a couple more techniques and polymer litho plate results to blog about, so up and away until tomorrow!
No comments:
Post a Comment